I was looking around the internet at random iPod hacks and mods and pretty soon I was inspired to build this thing. I think it came out really nice, and I was surprised as to how well I was able to do it. I've got some construction pics, but it was one of those impromptu projects, so I didn't really think of having a camera when I started.
Construction
Since I don't have pics of the very beginning steps, I'll just explain them. If you want to build one, you could e mail me, or if you're good at making things, just go for it.
Cutting
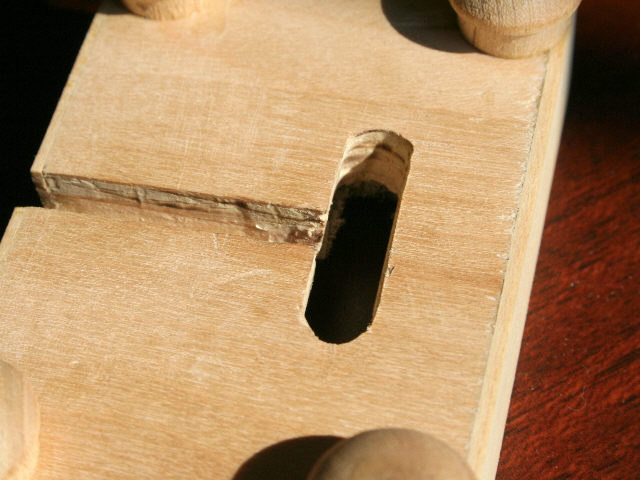
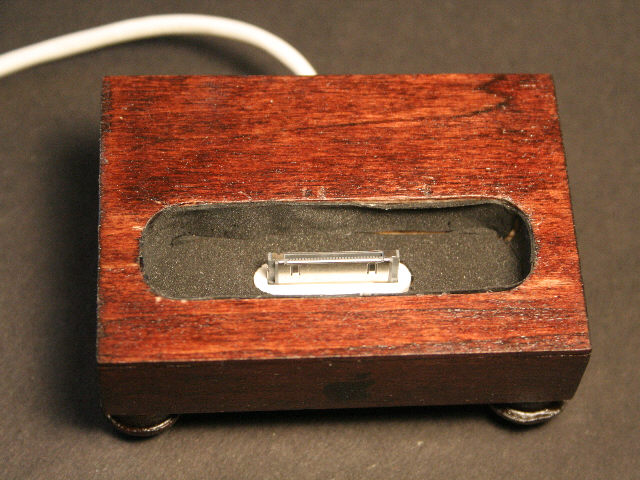
I started out with a block of wood, about 2" wide by 3" long. I used some 3/4" plywood I found laying around, but you could use any wood you find, as long as it's a good thickness. Next, I found the center of the long edge and used a miter saw to cut a groove in the piece for the cord to fit into. I also cut a small piece of wood as a plug to cover and hold in the cord. Since the blade is circular, I had to go and smooth out the bottom with a Dremel. After that, I found a drill bit that matched the thickness of the dock connector. The hardest part was probably getting the dock connector to enter at an angle. What I did is cut another piece of wood with a 15 degree angle on one of the edges. Then, I glued it perpendicular to another piece of wood with the angled edge up in order to form a base. I then lightly glued the dock onto the base with some hot glue. Now, when I put it on the drill press, the drill will enter straight down, but since the dock is on an angle, it will form and angled hole. I used the drill press to drill many holes all along where the dock connector goes. (I had traced out the shape of it onto the wood, so I knew exactly where to drill.) After the holes were drilled, I used a Dremel to smooth out the inside of the hole as best as I could. The finished groove and hole can be seen at the right. (Ignore the feet on each of the four corners, those come in later.) After that was done, I could begin the hole for the iPod itself. I used the same angled base, and the same technique as with the dock connector hole, but this time, I used a 1/2" drill bit. Also, I set the drill to a certain depth so that the iPod hole wouldn't go all the way through the dock. Once again, I smoothed out the hole and made any size adjustments using a Dremel. Once I had a hole that fit the iPod nicely, it was time to move on to veneering.
Veneering
 I
guess veneering isn't quite the right word for what I did, but its the closest
thing. Basically, I wanted to cover up any imperfections and stray Dremel
gouges in the original wood. I used 1/16" basswood and traced out the different
sides of the dock and then glued and carefully clamped them until they were
dry. I didn't cover up the bottom because, well, it's the bottom and no
one will be seeing it. The four sides were very easy to make: just cut out
a rectangle from the sheet of wood with a knife. The top, however was a
little more tricky.
I
guess veneering isn't quite the right word for what I did, but its the closest
thing. Basically, I wanted to cover up any imperfections and stray Dremel
gouges in the original wood. I used 1/16" basswood and traced out the different
sides of the dock and then glued and carefully clamped them until they were
dry. I didn't cover up the bottom because, well, it's the bottom and no
one will be seeing it. The four sides were very easy to make: just cut out
a rectangle from the sheet of wood with a knife. The top, however was a
little more tricky.
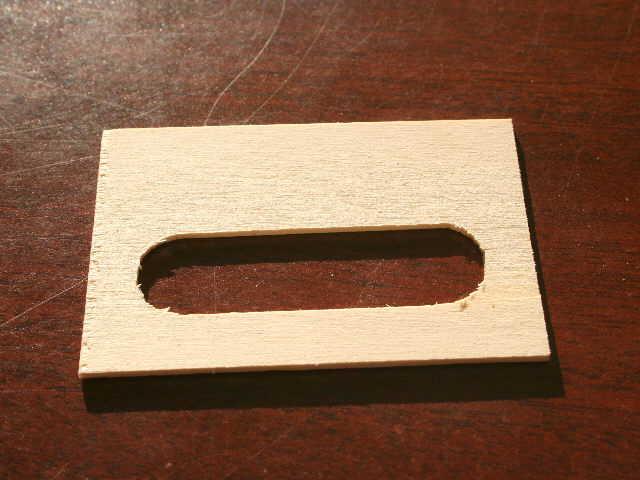
 The hole I had it the wood wasn't very smooth and nice-looking, so I
decided I'd make a nice hole in the basswood, and that would cover up the
messiness. I first used some tracing paper to trace out the shape of the
hole, then transferred it to cardstock. When I was cutting it out, I tried
to smooth out any bumps and make it look nicer. Then when I traced my newly
made stencil onto the basswood, I used a ruler to make it very sraight and
accurate. I also used a ruler when cutting the hole out to make my cuts
straight. To make the rounded corners look pretty, I used a drill bit gauge
as a circle template and traced a 1/2" circle into the corner. When it was
all cut out, I used a rounded file to finish off the corners, and some sandpaper
to further smoothen any imperfections. You can see the finished top veneer
to the left. After I had glued all the basswood pieces to the dock, I sanded
down all the sides in order to make the seams of the different pieces of
basswood flush. Also, sanding just makes stuff look nice, eh? Anyways, after
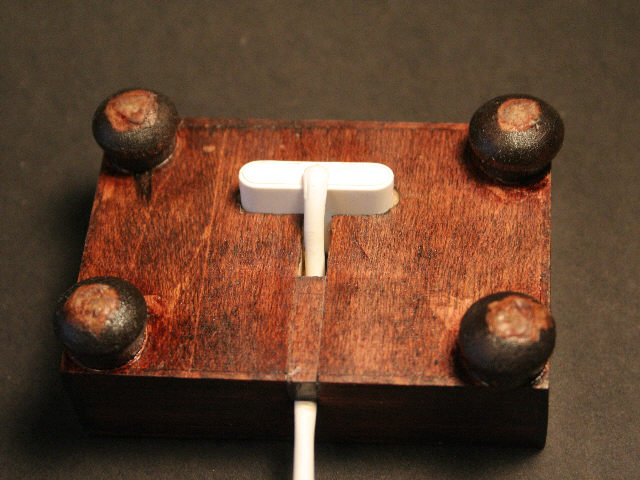
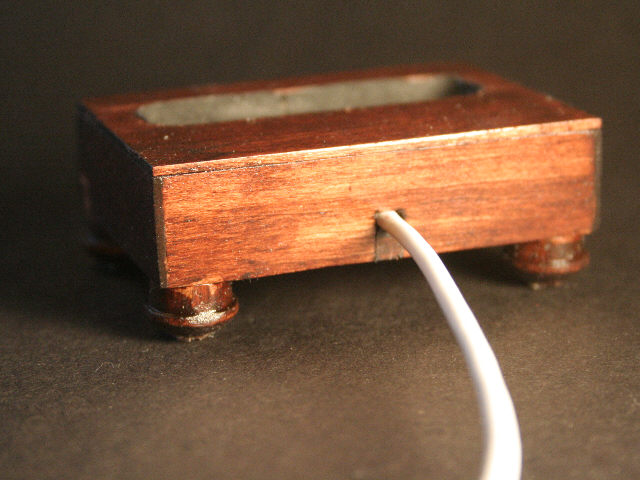
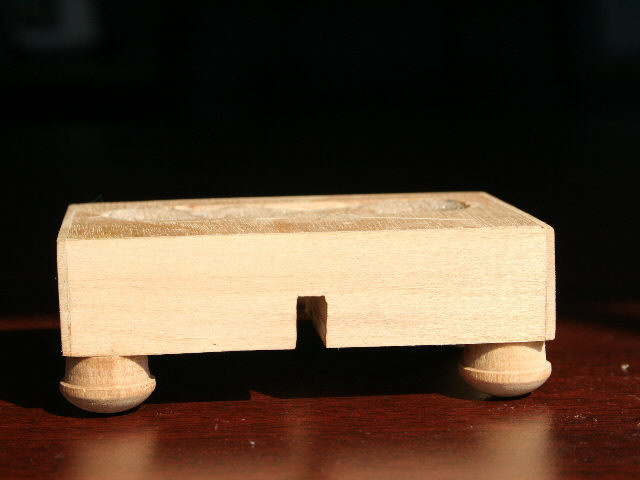
the veneering, I found some little wooden plugs, like the kind found on
stairway railings to cover up the screws. I glued four of these to each
corner to make little feet for it to stand on. Without them, it wouldn't
sit flat at all because the dock connector sticks out past the bottom of
the piece. A good view of the feet and the cord groove can be seen at right.
The hole I had it the wood wasn't very smooth and nice-looking, so I
decided I'd make a nice hole in the basswood, and that would cover up the
messiness. I first used some tracing paper to trace out the shape of the
hole, then transferred it to cardstock. When I was cutting it out, I tried
to smooth out any bumps and make it look nicer. Then when I traced my newly
made stencil onto the basswood, I used a ruler to make it very sraight and
accurate. I also used a ruler when cutting the hole out to make my cuts
straight. To make the rounded corners look pretty, I used a drill bit gauge
as a circle template and traced a 1/2" circle into the corner. When it was
all cut out, I used a rounded file to finish off the corners, and some sandpaper
to further smoothen any imperfections. You can see the finished top veneer
to the left. After I had glued all the basswood pieces to the dock, I sanded
down all the sides in order to make the seams of the different pieces of
basswood flush. Also, sanding just makes stuff look nice, eh? Anyways, after
the veneering, I found some little wooden plugs, like the kind found on
stairway railings to cover up the screws. I glued four of these to each
corner to make little feet for it to stand on. Without them, it wouldn't
sit flat at all because the dock connector sticks out past the bottom of
the piece. A good view of the feet and the cord groove can be seen at right.
Staining
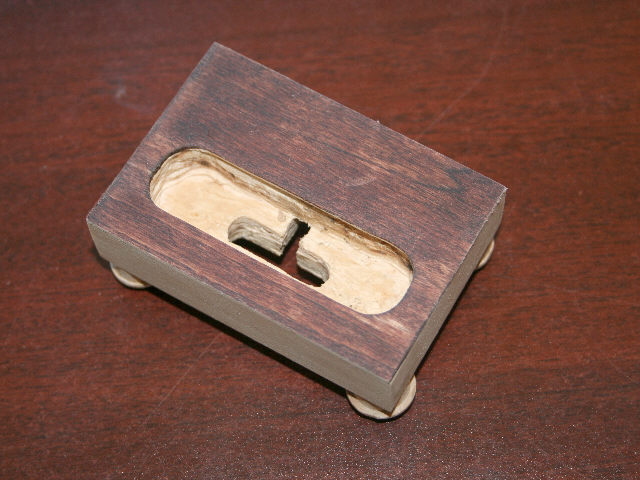 Well, not much to explain here. I used a mahogany stain and applied it with an
old rag. After a few minutes I wiped off the excess, and once the stain
was dry, I used a spray-on polyurethane to give it the professional, shiny
look. I didn't stain the inside of the hole, because there will be foam
in there later on to protect the rediculously sensitive iPod finish. Below
is a photo of the piece just after staining the top.
Well, not much to explain here. I used a mahogany stain and applied it with an
old rag. After a few minutes I wiped off the excess, and once the stain
was dry, I used a spray-on polyurethane to give it the professional, shiny
look. I didn't stain the inside of the hole, because there will be foam
in there later on to protect the rediculously sensitive iPod finish. Below
is a photo of the piece just after staining the top.
Putting 'Er All Together
 After
staining and poly was done, I could finally ready it for use. The first
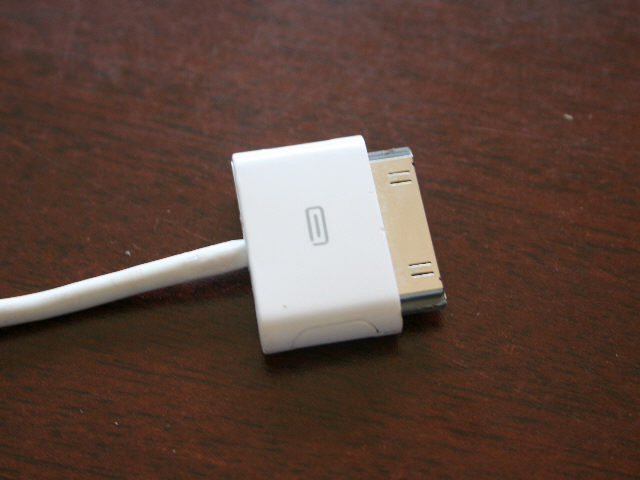
step was to remove those nasty little barbs on the end of the dock connector,
which lock it into the iPod. Since the buttons to release the iPod are soon
to be trapped in lumber, I had to make some adjustments. After the barbs
are ground off with a Dremel, the connector can come out just by pulling
on it and, surprisingly, still holds the iPod securely. I also removed the
little plastic piece that was right where the cord enters the plug. This
was just to allow the cord to bend back around more and give more ground
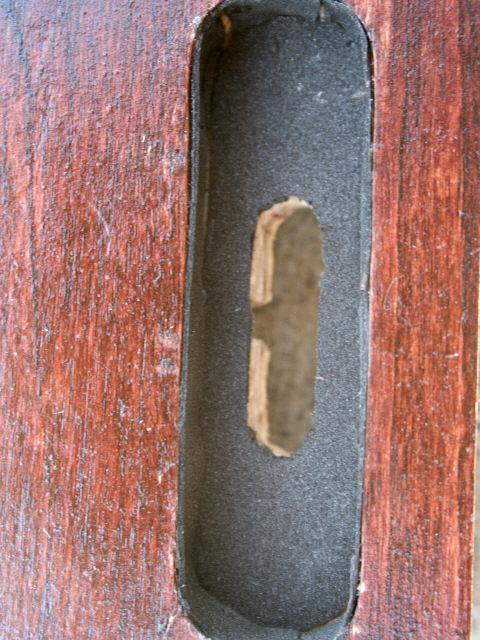
clearance. The final step was to install the foam. I got some very thin
(about 1/16") foam at a craft store that works well. I first cut out a piece
the shape of the hole for the bottom, then cut a hole out of that for the
connector to go through. Then I cut a strip to go around the inside of the
hole. When I test fit it, I found the foam around the inside was too thick
for the iPod to still fit in, I sanded it down to about half its thickness
with a belt sander. There's a detail of the foam to the left for your viewing
pleasure. I decided to add four little drops of hot glue to the bottom of
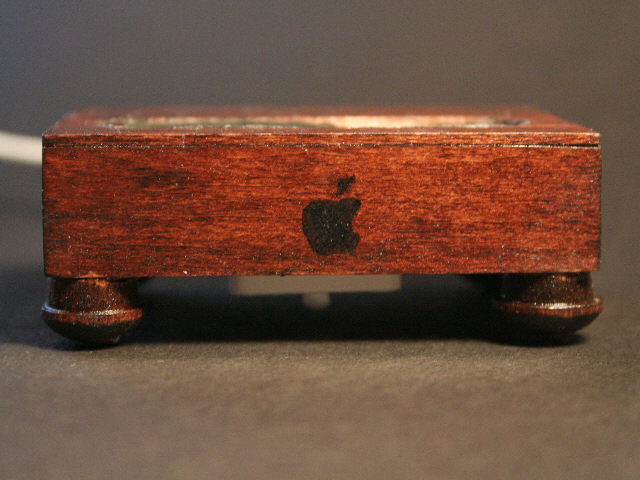
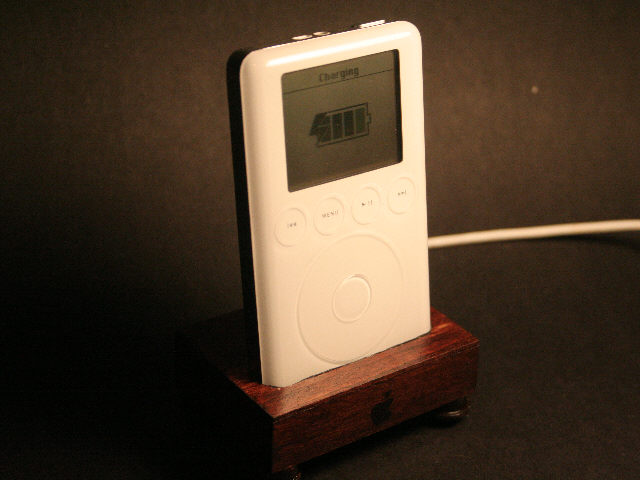
each of the feet for grip. The final step was to somehow get the Apple (there's
gotta be a trademark there somewhere) logo onto the front. I printed out
a picture of it from the Internet, and then taped it on some extra foam
from before. I cut out the logo using the picture as a guide, and then I
glued the foam logo onto a piece of wood (backwards I might add) in order
to make a stamp. With some black stamp ink, I very carefully stamped the
logo in the place I wanted it. Finally, I inserted the connector where it
goes put the cord plug in place, and it was complete!
After
staining and poly was done, I could finally ready it for use. The first
step was to remove those nasty little barbs on the end of the dock connector,
which lock it into the iPod. Since the buttons to release the iPod are soon
to be trapped in lumber, I had to make some adjustments. After the barbs
are ground off with a Dremel, the connector can come out just by pulling
on it and, surprisingly, still holds the iPod securely. I also removed the
little plastic piece that was right where the cord enters the plug. This
was just to allow the cord to bend back around more and give more ground
clearance. The final step was to install the foam. I got some very thin
(about 1/16") foam at a craft store that works well. I first cut out a piece
the shape of the hole for the bottom, then cut a hole out of that for the
connector to go through. Then I cut a strip to go around the inside of the
hole. When I test fit it, I found the foam around the inside was too thick
for the iPod to still fit in, I sanded it down to about half its thickness
with a belt sander. There's a detail of the foam to the left for your viewing
pleasure. I decided to add four little drops of hot glue to the bottom of
each of the feet for grip. The final step was to somehow get the Apple (there's
gotta be a trademark there somewhere) logo onto the front. I printed out
a picture of it from the Internet, and then taped it on some extra foam
from before. I cut out the logo using the picture as a guide, and then I
glued the foam logo onto a piece of wood (backwards I might add) in order
to make a stamp. With some black stamp ink, I very carefully stamped the
logo in the place I wanted it. Finally, I inserted the connector where it
goes put the cord plug in place, and it was complete! The Completed Dock
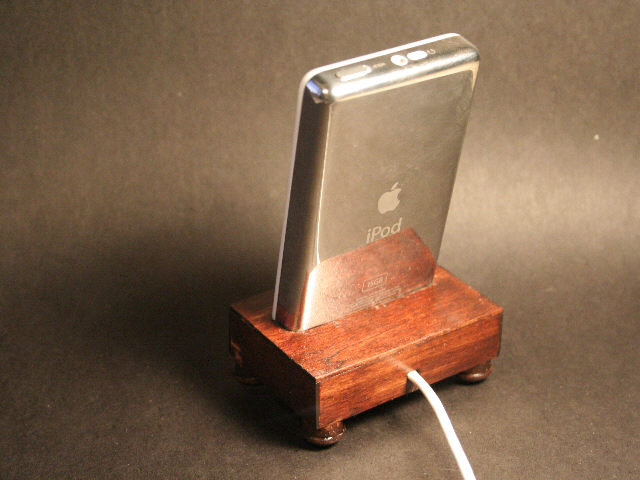
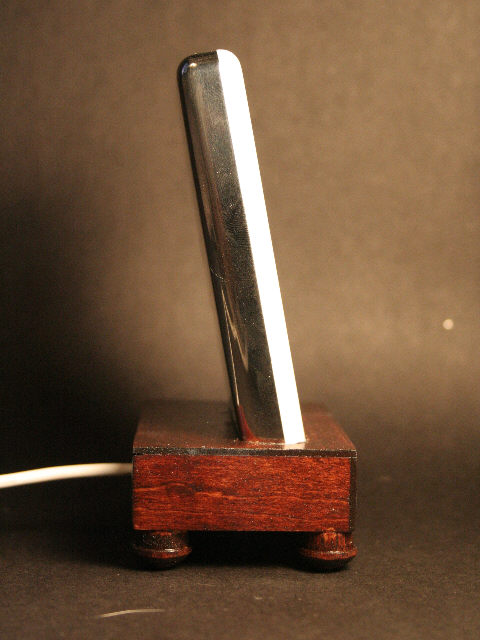
Heres the finished iPod dock in all its glory. Simply click on one of the thumbnails for a larger view.