Light Matrix Quilt! Click on any image to see it larger; scroll down for some process images and video.
|
|
|
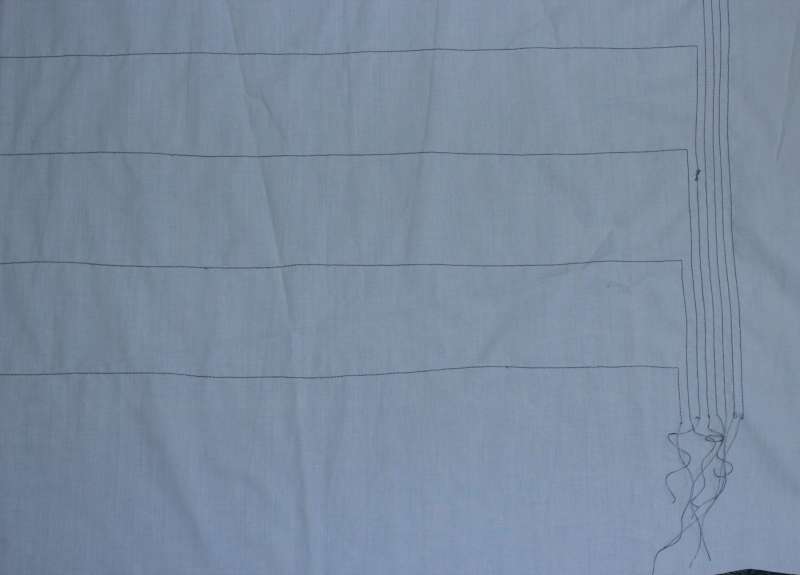
To reduce work later, I sewed the rows of the matrix by machine (by putting the conductive thread in the bobbin). They all come together in the corner where they will attach to the Lilypad Arduino. |
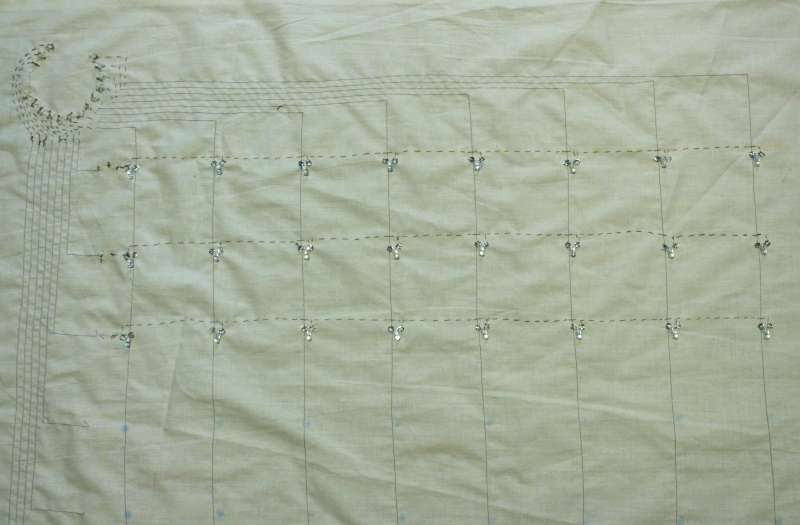
I then sewed on 64 LEDs by hand, which took quite me quite a few movies to get through. Using the embroidery hoop makes this 10x easier. |
|
|
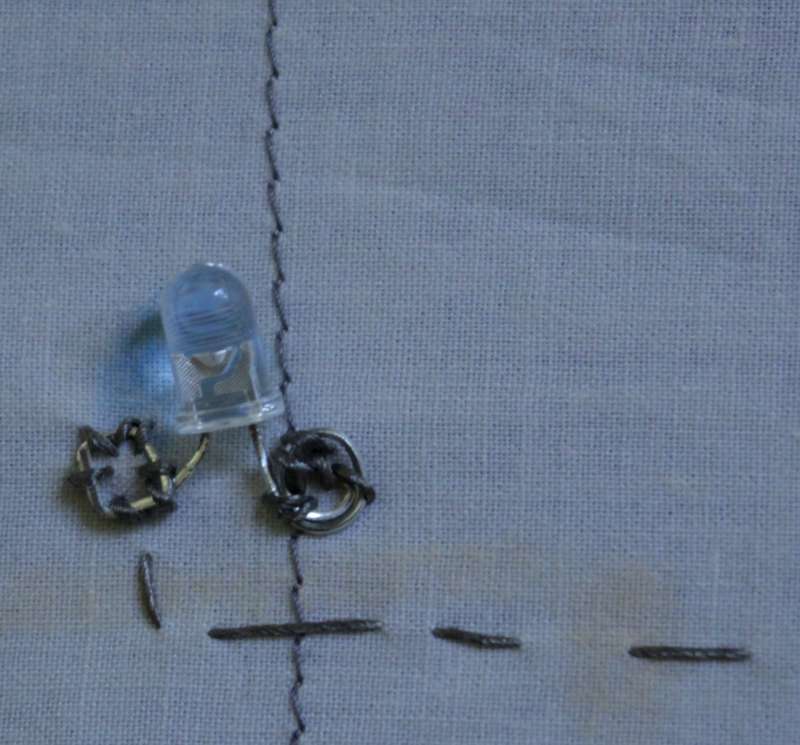
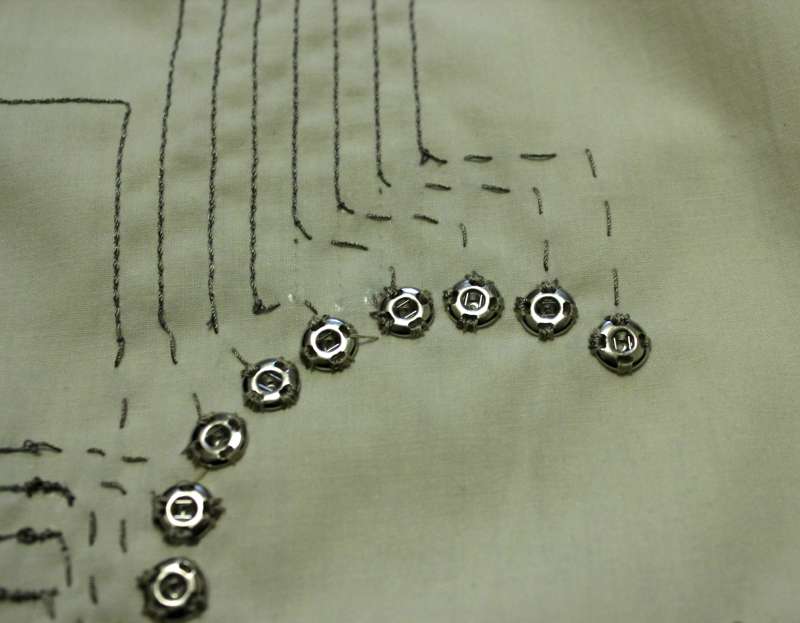
Each LED is at the intersection of 1 row and 1 column, and is turned on when that row and column are set to the appropriate low and high voltages (~ 5V) by the arduino. The vetical thread is just plain cotton thread, and the conductive trace is on the backside. By 'jumping' the row over the conductive column, I avoid short circuits. |
Phew... about 11 min / LED! |
|
|
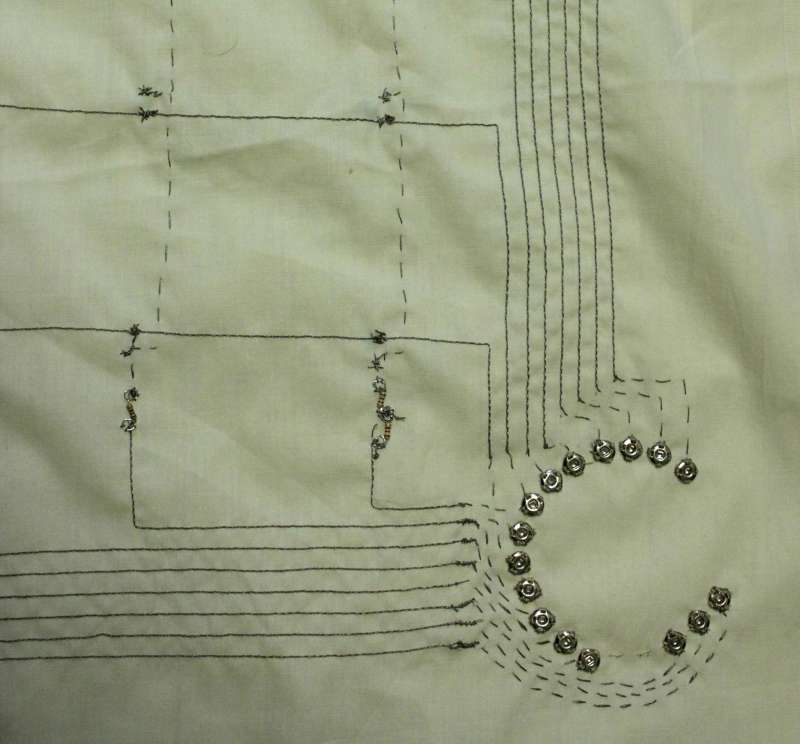
I put resistors at the end of each row to limit the current across that row. Because the resistance of the conductive thread is nontrivial at these distances (there are about 80 ohms of resistance difference from the first LED in a row to the last!), I chose resistances that would not burn out the first LED but not keep the last one from turning on, either. I also sewed female snaps to attach my lilypad arduino, which is attached to the corresponding male snaps. |
The snaps each go to one row or column of the quilt matrix, allowing the arduino to control each light (each row, col combination) individually. Because I don't want to break my conductive thread when I unsnap snaps, I reinforced the conductive thread with normal grey thread. |
|
After the matrix was complete, I tested it with the lilypad and a basic random walk amongst the LEDs. |
|
|
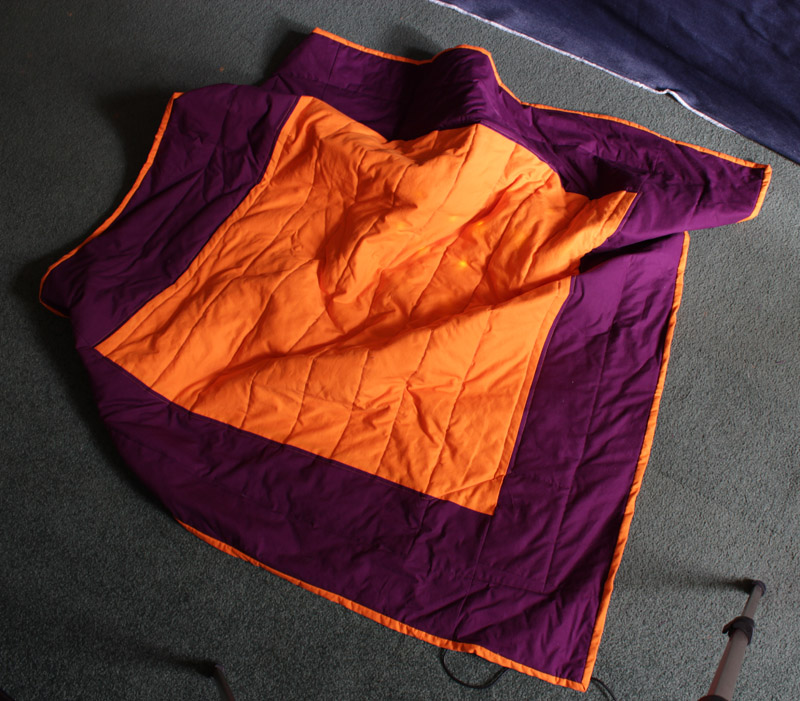
I then quilted the quilt. It was like a LED matrix sandwich: back layer of purple, LED matrix layer, layer of cotton batting, front layer of purple and orange panels. I loosely followed Bend the Rules Sewing by Amy Karol. |
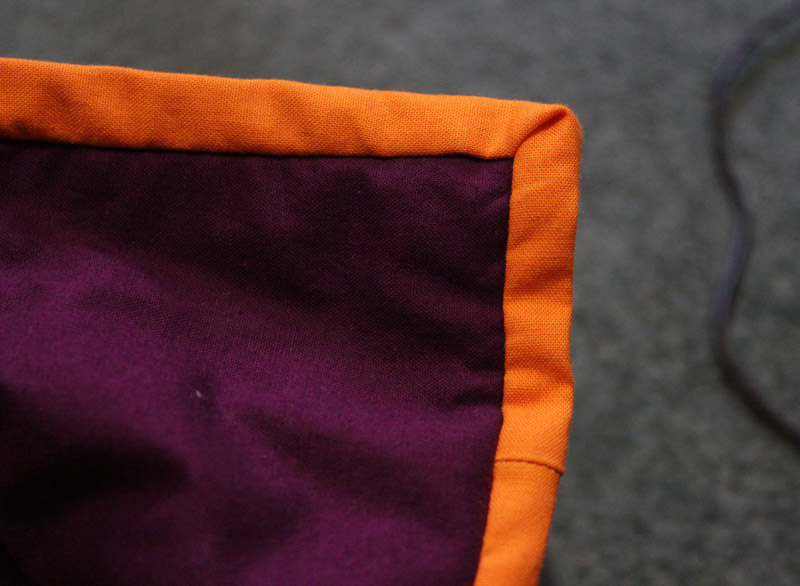
I sewed on the back of the binding by hand, using invisible hem stitch. More movies! |
|
|
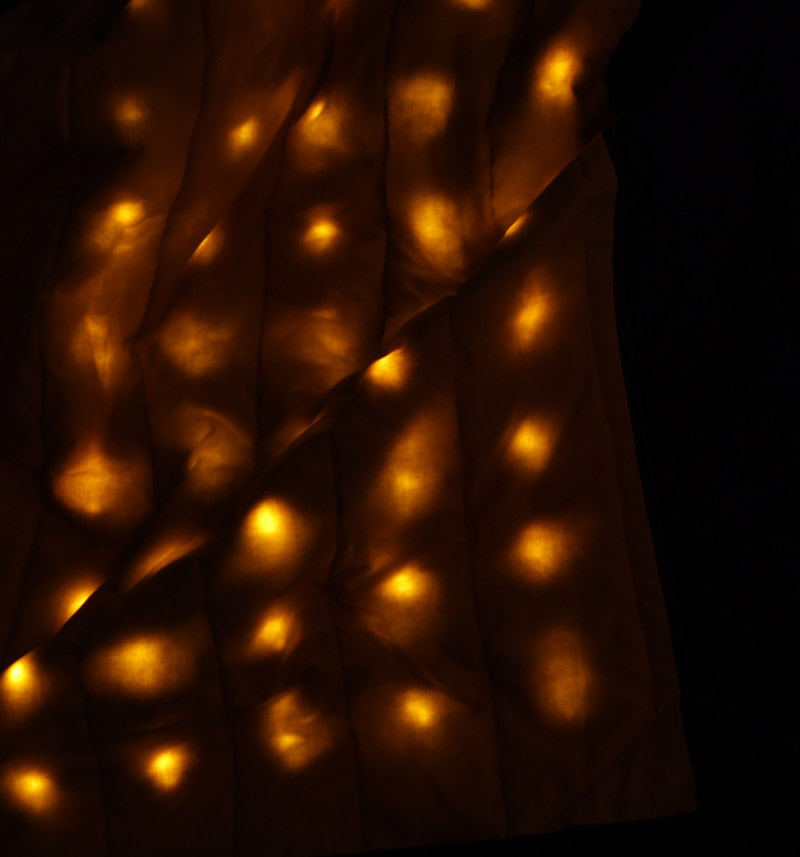
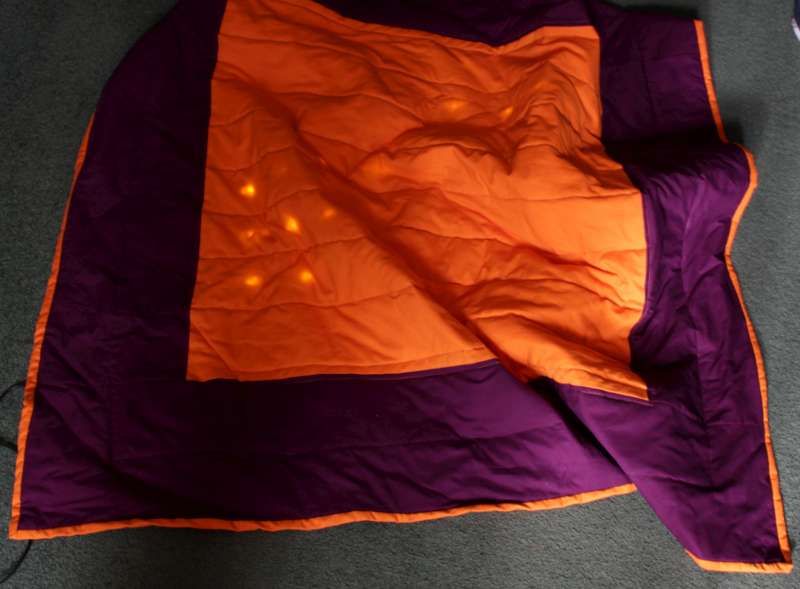
Here is a long exposure of the quilt. You can see the LED lights glow through the batting, and the fun wrinkles in the quilt. The best part is that it is deformable and soft! |
Ta da! A light-up quilt! |
|


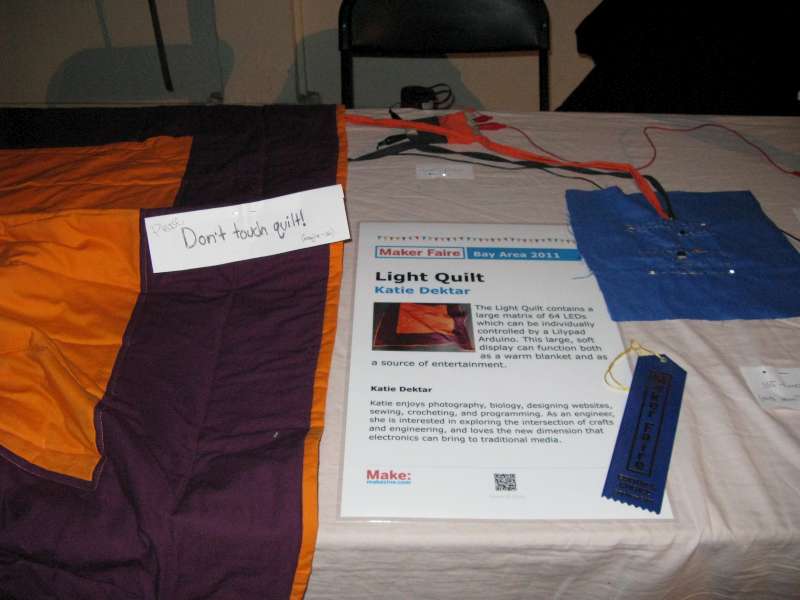
This project was at Maker Faire Bay Area, 2011 and won an Editor's Choice Award!